
How to Use AI Photo Prompts
A practical beginner’s guide to turning a rough photo idea into a clear, customizable AI prompt.
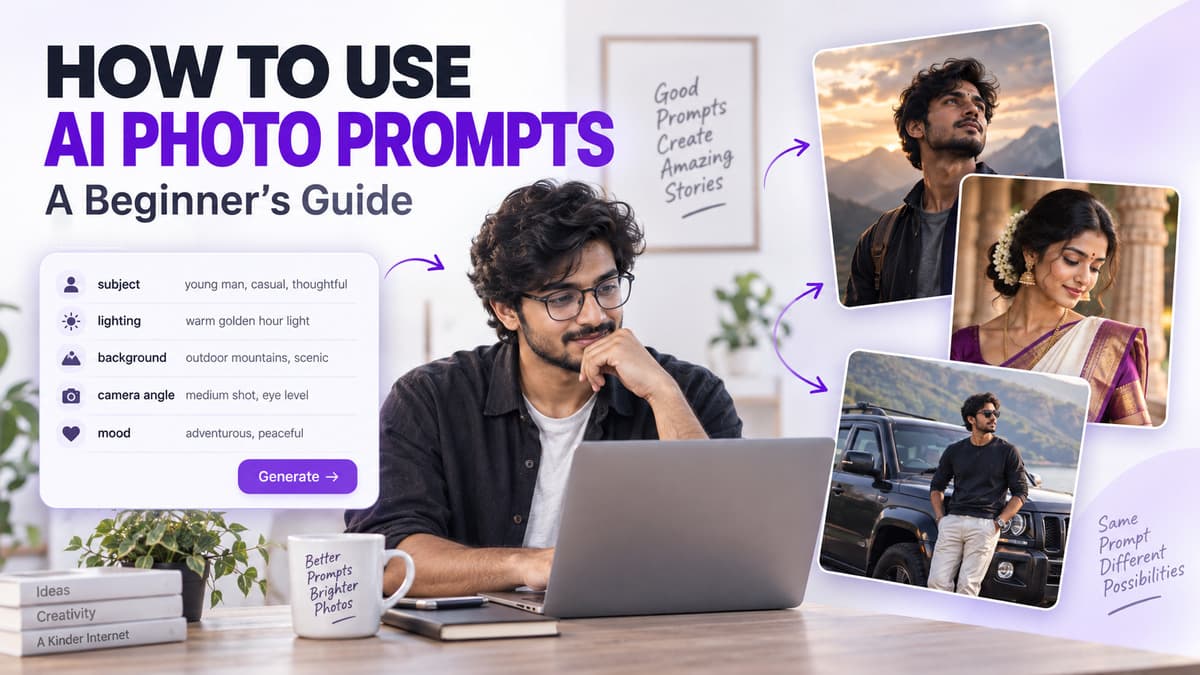
AI photo prompts are useful because they turn a rough visual idea into a clearer creative direction. Instead of typing a few random words and hoping for a good result, you can describe what should appear in the scene, how the subject should look, where the photo should be set, and what kind of lighting or mood you want.
The goal is not to create the longest possible prompt. The goal is to give a compatible AI tool enough useful direction to understand your idea. Prompt King is designed around this workflow: discover a ready-to-copy photo prompt, open a style you like, copy the text, customize the important details, and then use that prompt in a compatible AI tool of your choice.
What does an AI photo prompt actually do?
Think of an AI photo prompt as a set of creative instructions. It can describe the main subject, clothing and styling, facial expression, body pose, location, time of day, lighting, camera position, framing, background treatment and overall mood. A vague idea such as “a man with a car” leaves many decisions open. A more useful direction might describe a young man leaning beside a dark SUV on a quiet roadside during the evening, wearing a black jacket and sunglasses, with a relaxed expression, soft side lighting, realistic outdoor photography, three-quarter framing and a gently blurred background.
Decide the main idea before adding details
A prompt becomes much easier to write when you already know the purpose of the image. Your idea could be a stylish profile portrait, a traditional festival look, a dramatic bike photo, a romantic couple scene, a birthday portrait, a bridal visual, a retro-style image or a simple professional portrait. Once the main concept is fixed, every other detail should support it. A clear concept keeps the prompt focused instead of turning it into a collection of unrelated visual effects.
Put the main subject first
The subject should be easy to identify from the beginning of the prompt. Instead of writing something vague like “a person in a nice place,” describe a young woman wearing a pastel traditional outfit in a flower garden, or a young man in casual streetwear sitting beside a motorcycle on an open road. You do not need to describe every physical feature. Choose only the details that matter to the visual idea, such as outfit, hairstyle, accessories, pose, expression, direction of gaze or interaction with an object.
Use pose to give the image personality
Two prompts can describe the same person but create completely different visual directions because the pose changes. “Standing beside a bike” is much less specific than “standing beside a bike with one hand resting on the handlebar, body turned slightly away from the camera and a calm expression.” You can experiment with walking naturally, sitting on a step, leaning against a wall, looking over one shoulder, standing with relaxed hands, looking away from the camera or holding a simple prop. Keep the pose believable and avoid stacking too many body actions into one instruction.
Match the expression to the mood
Expression is a small detail that can change the entire feeling of a portrait. A soft image may use a gentle natural smile, while a cinematic scene may call for a calm, thoughtful expression with the subject looking slightly away. A stronger editorial portrait might use a confident neutral expression. Avoid combining several opposite emotions in the same scene. Pick one emotional direction that supports the image you are trying to create.
Clothing helps define the visual style
Outfit choices can make the same scene feel modern, traditional, casual or premium. Useful descriptions may include a formal suit, denim jacket, traditional kurta, saree, bridal outfit, streetwear, monochrome clothing, pastel fashion, festive attire or a casual white shirt. Focus on the clothing details that affect the overall look. If you edit a copied prompt, remove any old outfit instructions so the text does not accidentally describe two different looks at once.
Choose one strong location
The background should support the subject rather than compete with it. A village road, open field, modern city street, garden, rooftop, studio, beach, wedding venue, forest path, highway, café or traditional courtyard can all work when they fit the concept. A simple location is often easier to control than a complicated one. A quiet roadside with distant trees and soft background blur is usually more coherent than a scene that tries to combine mountains, a beach, city towers, neon signs and a forest at the same time.
Lighting can change the entire scene
Lighting often has more impact on mood than people expect. For a soft portrait, you might describe gentle natural daylight with smooth facial shadows. For warmth, use low evening sunlight with soft golden highlights. A dramatic image can use directional side lighting with controlled shadows, while a clean studio look might use diffused front lighting with even skin tones. Try to choose one main lighting idea instead of mixing several incompatible times of day or light sources.
Tell the tool how the photo should be framed
Framing describes how much of the person or scene should be visible. Common options include close-up, head-and-shoulders, waist-up, three-quarter view, full-body portrait and a wide environmental shot. Camera position can also be useful: eye level, a slightly low angle or a top-down composition can each create a different visual feel. Choose a framing style that suits the purpose of the image rather than asking for several conflicting crops at once.
Add style words only after the scene is clear
Words such as cinematic, dreamy, editorial, vintage and premium can help, but they work better when the visible scene is already defined. Instead of only writing “cinematic portrait,” describe a quiet evening portrait with soft side light, shallow depth of field, controlled contrast and a subdued urban background. Style words should support the prompt, not replace the visual instructions that explain what you actually want to see.
How to use a prompt on Prompt King
Start by browsing a category that matches the type of image you want. Open a prompt that feels close to your idea, read the complete prompt, and look at the accompanying image to understand the visual direction. Use Copy Prompt, then edit the copied text before using it elsewhere. You may want to change the outfit, background, hairstyle, pose, facial expression, vehicle, colors, lighting, camera angle or crop. Once the changes are ready, paste the prompt into a compatible AI tool of your choice. Prompt King helps with prompt discovery and copying; it does not generate the final image through this website flow.
Example: turning a simple idea into a better prompt
Start with a basic idea such as “a boy with a motorcycle.” That gives almost no visual direction. A stronger version could be: “A young man standing next to a black motorcycle on a wide rural road during early evening, wearing a casual dark jacket, one hand resting naturally on the handlebar, calm expression, soft sunlight from the side, full-body composition, realistic photography and subtle background blur.” The improved version is easier to understand because the subject, location, clothing, pose, lighting, framing and visual style are all clear.
Do not add details just to make the prompt longer
A longer prompt is not automatically a better prompt. Extra words can create unnecessary confusion, especially when the same idea is repeated several times. If the important visual details are already clear, there is no need to stack endless quality labels. Practical instructions such as soft natural light, full-body portrait, neutral expression, simple background and shallow depth of field are often more useful than vague praise words. Clarity matters more than length.
Change one major element at a time
When you want to improve a result, changing everything at once makes it difficult to understand what actually helped. A better approach is to revise one main detail. You could compare warm sunset lighting with soft cloudy daylight, then move on to another change such as the background or camera angle. This makes prompt editing more controlled and helps you keep the parts that are already working.
Be careful with reference photos
Some third-party AI tools allow users to upload photos as references. If you choose to use that feature, make sure you have permission to use the photo and review the privacy settings, upload rules and data policies of that tool before submitting personal photographs. Prompt King itself is focused on prompt discovery and copying. Reference-photo handling is controlled by the external tool you decide to use.
Common prompt problems to avoid
One common issue is contradiction, such as asking for bright afternoon sunlight in a dark midnight scene. Another is conflicting framing, such as requesting a close-up full-body portrait. Overloading the scene with too many objects, locations, lighting styles and clothing instructions can also make the concept less clear. Repetition creates the same problem. A clean prompt is easier to understand, customize and refine.
Check the result before sharing it
Even a carefully written prompt may not produce exactly what you expected. Review the result closely and look at hands, fingers, facial features, jewelry, clothing, vehicle parts, background objects, shadows, reflections, unwanted text and the final crop. If most of the result is good, adjust the specific issue instead of rewriting everything. For example, if the composition is too tight, change the framing direction from waist-up to full-body.
Save prompt versions that work well
When you find a useful version of a prompt, keep a copy before experimenting further. You might save one version with warm evening light, another with cloudy daylight and a third with wider framing. Keeping simple versions makes it easier to compare changes and return to a direction you liked instead of trying to remember the exact wording later.
Using photo prompts for social content
AI photo prompts can also help you plan profile pictures, festive posts, traditional portraits, couple concepts, bike or car images, birthday visuals, cinematic portraits and seasonal designs. Think about the final format before choosing the composition. A vertical composition may suit portrait-based social content, while a wider scene may work better for banners or landscape posts. Available aspect-ratio controls will depend on the AI tool being used.
Why the same prompt can produce different results
The same text does not always create the same image. Different tools interpret instructions in different ways, and results may also change because of model updates, image settings, reference images, aspect ratio, generation parameters, tool-specific restrictions or extra user instructions. It is better to treat a prompt as a flexible creative brief rather than an exact formula that guarantees one fixed result.
A simple formula for building your own prompt
A useful beginner structure is: subject + pose + outfit + location + lighting + framing + mood. For example, you might start with “a young woman + standing beside a garden wall + pastel saree + flowering courtyard + soft morning light + waist-up portrait + elegant natural mood,” then turn those parts into a complete sentence. This simple order gives you a reliable starting point without making prompt writing feel complicated.
Final thoughts
Using AI photo prompts becomes easier when you stop treating them as complicated technical commands. A useful prompt is simply a clear description of a visual idea. Start with the subject, decide the pose, choose a setting, describe the light, select the framing and add only the style details that support the scene. Prompt King can help you discover different creative directions without forcing you to start from an empty prompt box. Browse a style you like, copy the prompt, make thoughtful changes and use it as the foundation for your next photo concept.
Frequently Asked Questions
What should I change first in a copied AI photo prompt?
Start with the details that make the scene personal to your idea, such as clothing, location, pose or lighting. You usually do not need to rewrite the entire prompt.
Are longer prompts always better?
No. A clear and consistent prompt is more useful than a very long prompt filled with repeated or conflicting instructions.
Can I edit prompts copied from Prompt King?
Yes. Prompt King prompts are meant to give you a starting direction. You can adjust the visual details to suit the image concept you want to explore.
Does Prompt King create images on the website?
No. Prompt King helps you discover and copy photo prompts. You can use the copied text with a compatible AI tool of your choice.
Can I upload my personal photo to an AI tool?
That depends on the external tool you use. Check its privacy rules and upload terms first, and only use photos that you have permission to upload.
Put an idea into words.
Find a prompt, change a detail, and explore a new direction.
Explore prompts →